According to an online survey, the statistics show that up to 90 of 100 laptop users have not yet protected their laptop with a password. Is your PC password protected? If not, here are recommend two methods: creating BIOS passwords and Windows passwords. A BIOS password is the extremely strong password that locks up the hardware and makes the laptop completely unusable. Only logging with the password can you enter into the operating system.
Follow the below steps
1.Create a BIOS password. Restart the laptop, and press F2 continuously to the following interface.
press F2 to enter setup
2.Select the security with the cursor and choose "Set User" password or "Set User Password" and press enter.
setup-utility
·Note: The difference between Set User Password and Set Supervisor Password: User password controls access to the system at boot; supervisor password controls access to the setup utility.
3. After pressing Enter, fill the blank space with your password and confirm it.
4. Press Enter and pop up Setup Notice, which means that you have reset BIOS password will appear. Press Enter to choose "Continue"
5. Press F10 to save it and select Yes to exit, your laptop will log on automatically.
Note: A BIOS password is hard to reset, ensure your can never forget the password used. The best place and safest place for your password is your brain, no one can extract it from there unless you say it.
Is this tutorial helpful? Then like us and share on facebook
Need more explanation? Need a particular tutorial? Have a question?...
Then CONTACT US HEREor drop your comment below
Notice:This tutorial is for educational purpose and if caught for misuse, Naijaconfirm.com will not be responsible for any penalty or prosecution. Use wisely. >>Browser>> Google Chrome or Mozilla Firefox >>Sample Site>> Facebook.com >>Max Time frame to get the password>> 10seconds
Capture, get, or see any password typed on your computer. You don’t need any Password Hacking knowledge neither do you need a password hacking software like keyloggers. Yes this is possible using Simple Web browsers like Google Chrome and Mozilla Firefox. Still you may not believe this! see, you can find any asterisk symbol passwords in your Browser only if the Password is Typed in the Password Text Field. So, you can ask where can i find the typed passwords?. Don’t worry, if Luck is Besides you then you will definitely get a chance for that. Mostly it is easier when the person Enabled the “Auto Remember Password” option. You may have to play pranks (just for fun) wait for someone to type their password, once they’ve entered the password, just Divert their Sight to anything else (example:- Uptown Mama is calling you outside ). Once they were diverted, that's the perfect time for you to find the passwords. Now we can see how to execute our Master Plan !!
Assuming we are on the facebook homepage and all details are typed as in the image below
fb-login-page
Put your cursor on the password field (where those asterisks for password are showing) and right click, then left click on "Inspect Element"
Right-Click-on-password-field
When the inspection dialog opens beneath in your browser, locate the immediate highlighted line
<input id="pass" class="inputtext" type="password" tab.......></input>
input-line
From that line, locate type="password" and double click on "password"
double-click password to edit it
Now that editing is enable, change the word "password" to "name" and hit the ENTER KEY on your keyboard. Now you'll have something like the image below.
now that it's changed to "name", view the password field and the password will show to you clearly like the image below.
password-showing
At this point, you'll have to close the inspect by pressing F12 on your keyboard and refresh the browser by pressing F5. See the image below to close inspector.
close-inspector
Is this tutorial helpful? Then like us and share on facebook
Need more explanation? Need a particular tutorial? Have a question?...
Then CONTACT US HEREor drop your comment below
This tutorial is subjected to step by step practicing and we assumed that you are already familiar with windows environment. At any time in this tutorial, the word CLICK simply means to LEFT CLICK unless stated otherwise, DOUBLE CLICK means to LEFT CLICK twice simultaneously. DRAG means to LEFT CLICK and HOLD, and then move your mouse from one point to another.
We will be basically using COREL DRAW X3,WINDOWS XP from beginning and later WINDOWS 7 throughout this tutorial. Despite having different versions of corel draw, a lower version to X3 or higher than it can be used for this tutorial but there might be little differences depending on the version of corel you are using. [Other versions of corel are: corel 9, 10, 11, 12, X4, X5, X6 and X7]. The basic function of corel draw is for graphics design (putting your imagination into drawing). We will advise you have a safe place where your corel files (.cdr) are saved in case of when references are made to previous drawing and the steps involved in doing them. How to get CorelDraw...
Search google to see those who offer free/cracked corel software or visit the trusted corel download page to get trial version. Need Original CorelDraw Software, then contact us.
Launching corel Draw
Corel draw can be launched on your computer like every other programs. To do this, look for corel draw shortcut on your desktop and double click on it or click on the windows start button at the left bottom of your screen as shown below.
windows xp start button
As soon as the start button is clicked, a start up menu will appear showing programs installed on your computer; you may get your corel draw icon from here or you’ll click on all programs to locate it as shown below
win-xp start menu
After locating your corel draw, double click on it and it will open.
Just as you might use your hands to interact with objects in the physical world, you can use your mouse to interact with items on your computer screen. You can move objects, open them, change them, throw them away, and perform other actions, all by pointing and clicking with your mouse.
Basic parts
A mouse typically has two buttons: a primary button (usually the left button) and a secondary button (usually the right button). You will use the primary button most often. Most mice also include a scroll wheel between the buttons to help you scroll through documents and webpages more easily. On some mice, the scroll wheel can be pressed to act as a third button. Advanced mice might have additional buttons that can perform other functions.
Parts of a mouse
Holding and moving the mouse
Mouse pointers
Place your mouse beside your keyboard on a clean, smooth surface, such as a mouse pad. Hold the mouse gently, with your index finger resting on the primary button and your thumb resting on the side. To move the mouse, slide it slowly in any direction. Don't twist it—keep the front of the mouse aimed away from you. As you move the mouse, a pointer (see picture) on your screen moves in the same direction. If you run out of room to move your mouse on your desk or mouse pad, just pick up the mouse and bring it back closer to you.
Hold the mouse lightly, keeping your wrist straight.
Pointing, clicking, and dragging
Pointing to an item on the screen means moving your mouse so the pointer appears to be touching the item. When you point to something, a small box often appears that describes the item. For example, when you point to the Recycle Bin on the desktop, a box appears with this information: "Contains the files and folders that you have deleted."
Pointing to an object often reveals a descriptive message about it.
The pointer can change depending on what you're pointing to. For example, when you point to a link in your web browser, the pointer changes from an arrow to a hand with a pointing finger .
Most mouse actions combine pointing with pressing one of the mouse buttons. There are four basic ways to use your mouse buttons: clicking, double-clicking, right-clicking, and dragging.
Clicking (single-clicking)
To click an item, point to the item on the screen, and then press and release the primary button (usually the left button).
Clicking is most often used to select (mark) an item or open a menu. This is sometimes called single-clicking or left-clicking.
Double-clicking
To double-click an item, point to the item on the screen, and then click twice quickly. If the two clicks are spaced too far apart, they might be interpreted as two individual clicks rather than as one double-click.
Double-clicking is most often used to open items on your desktop. For example, you can start a program or open a folder by double-clicking its icon on the desktop.
Tip
If you have trouble double-clicking, you can adjust the double-click speed (the amount of time acceptable between clicks). Follow these steps:
Open Mouse Properties by clicking the Start button , and then clicking Control Panel. In the search box, type mouse, and then click Mouse.
Click the Buttons tab, and then, under Double-click speed, move the slider to increase or decrease the speed.
Right-clicking
To right-click an item, point to the item on the screen, and then press and release the secondary button (usually the right button).
Right-clicking an item usually displays a list of things you can do with the item. For example, when you right-click the Recycle Bin on your desktop, you'll see a menu with options to open it, empty it, delete it, or see its properties. If you're ever unsure of what to do with something, right-click it.
Right-clicking the Recycle Bin opens a menu of related commands.
Dragging
You can move items around your screen by dragging them. To drag an object, point to the object on the screen, press and hold the primary button, move the object to a new location, and then release the primary button.
Dragging (sometimes called dragging and dropping) is most often used to move files and folders to a different location and to move windows and icons around on your screen.
Using the scroll wheel
If your mouse has a scroll wheel, you can use it to scroll through documents and webpages. To scroll down, roll the wheel backward (toward you). To scroll up, roll the wheel forward (away from you).
Customizing your mouse
You can change your mouse settings to suit your personal preferences. For example, you can change how fast your mouse pointer moves around the screen, or change the pointer's appearance. If you're left-handed, you can switch the primary button to be the right button.
Tips for using your mouse safely
Holding and moving your mouse properly can help you avoid soreness or injury to your wrists, hands, and arms, particularly if you use your computer for long periods of time. Here are some tips to help you avoid problems:
Place your mouse at elbow level. Your upper arms should fall relaxed at your sides.
Don't squeeze or grip your mouse tightly. Hold it lightly.
Move the mouse by pivoting your arm at your elbow. Avoid bending your wrist up, down, or to the sides.
Use a light touch when clicking a mouse button.
Keep your fingers relaxed. Don't allow them to hover above the buttons.
When you don't need to use the mouse, don't hold it.
Take short breaks from computer use every 15 to 20 minutes.
Is this tutorial helpful? Then like us and share on facebook
Need more explanation? Need a particular tutorial? Have a question?...
Then CONTACT US HEREor drop your comment below
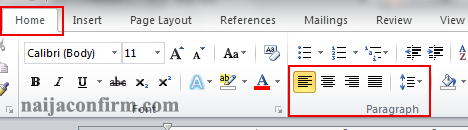
The default alignment for text in a Word document is for it to be left justified. However, you can change that. The alignment buttons on the Home tab (in the Paragraph group) allow us to justify, or align, not only text but other objects as well.
home tab and paragraph ribbon
alignment
The images on each button give you a good idea of what each alignment option does. When aligning text in Word, all you have to do is place the cursor in a particular paragraph and click one of the buttons. The alighnment affects only that paragraph and no other. Of course, you can select multiple paragraphs and then click one of the alignment buttons and all selected text will be aligned.
Additionally, you can select objects as well as text and align those too using the same buttons. If you want to align an image in your document, you'll find that the Position command (Picture Tools > Format > Arrange) is more versatile, though.
The Position command is available for all objects you can insert into your document. It gives you the ability to position an object to the left, middle or right horizontally and top, middle or bottom vertically.
Now that we know how to align our text and images, how will we know where anyone's document is aligned to?
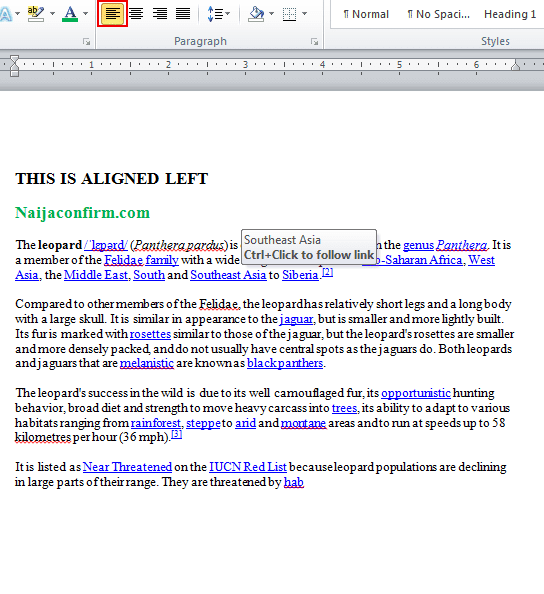
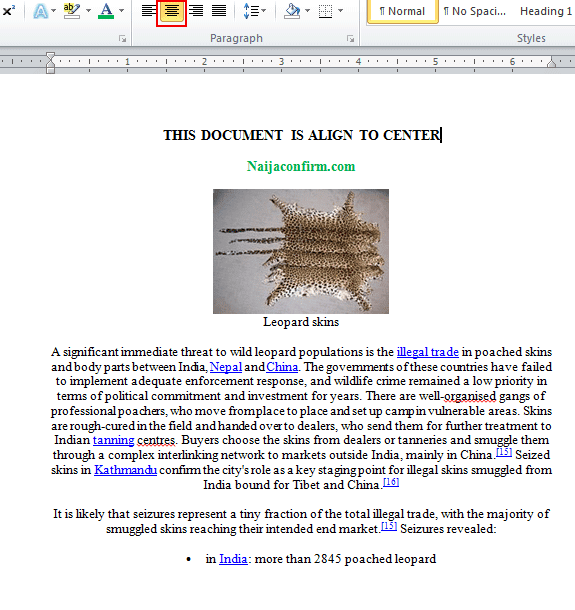
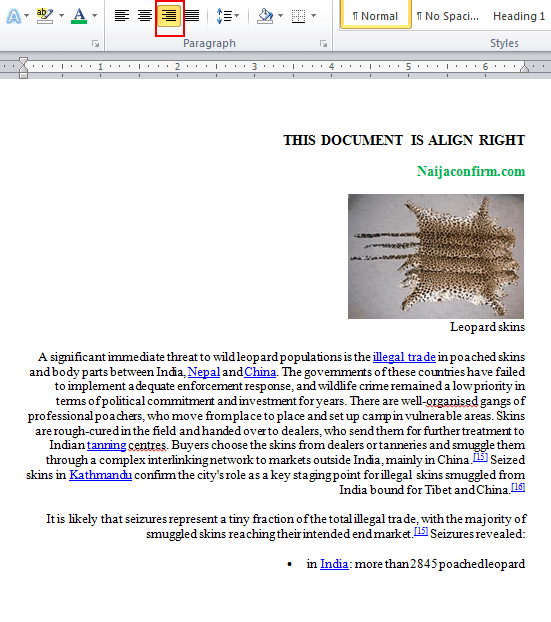
As soon as a document is opened, what you're seeing is what will determine where the document is aligned to... See images below
Align Left.
From the alignment ribbon, you'll notice that the first symbol is coloured orange. This signifies the document is aligned left.
align to center
align right
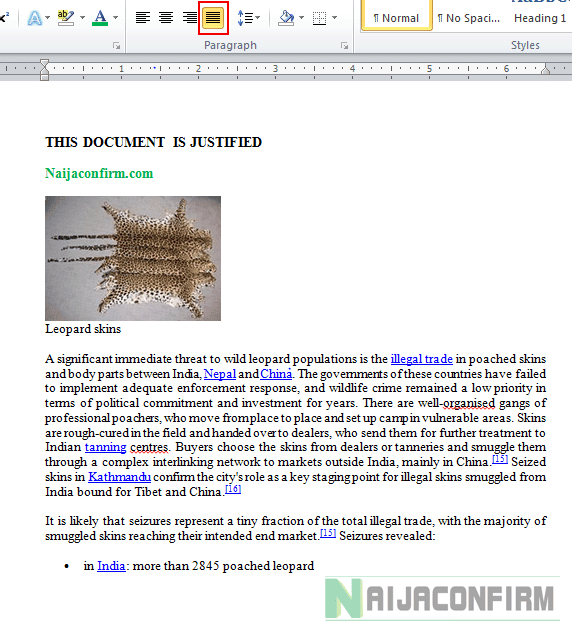
JUSTIFIED
Is this tutorial helpful? Then like us and share on facebook
Need more explanation? Need a particular tutorial? Have a question?...
Then CONTACT US HEREor drop your comment below
We all know how annoying it is when we are sent a Word document and we open it in Adobe, or if we are sent a PDF document and we try to open it in Word, and all you get is a jumbled mash of pictures, a messed up layout and sometimes a completely different language. It is simply a pain to try and convert every single document into another format simply so that we can read its contents in the manner in which it is meant to be read. There are so many online tools that offer this services but believe me, all they are after is to have access to your email address, take you as a customer and not to help you.
So many might request for money before they will render this service but docs.zone will offer it even if they will request for money, you'll still be able to convert for free by following the below steps.
Visit docs.zone
docs.zone screen capture
See the area marked red in the above screenshot. Locate that part when your browser opens and select your desired conversion link.
How to continue converting after exceeding your free trial...
What docs.com does immediate you visit the website is to track you. So in order to continue using their service freely, you have to permit the website to track you first, disconnect it (not closing your browser) and continue. This below image will pop - up after you might have exceeded the limit of free conversion.
After seeing the above image, close it. On your keyboard, press ctrl + shift + delete (on mozilla, google chrome or internet explorer) and clear all browsing history including all cookies.
keyboard short-cut
Now open a new tab on your browser (ctrl + T) and visit docs.zone to convert freely. Repeat the clearing steps as long as you still want to convert freely.
Is this tutorial helpful? Then like us and share on facebook
Need more explanation? Need a particular tutorial? Have a question?...
Then CONTACT US HEREor drop your comment below
Google on Thursday announced it will shut down support for Chrome on Windows XP at the end of the year.
"We will continue to provide regular updates and security patches to Chrome on XP through the end of 2015," said Mark Larson, Chrome's director of engineering, in a short blog post Thursday.
A year and a half ago, Larson pledged to support Chrome on the even-then-aged operating system until "at least April 2015."
"We know that not everyone can easily switch to a newer operating system," Larson said of Google's decision to continue supporting Chrome on XP after the latter's retirement. "Millions of people are still working on XP computers every day [and] we want those people to have the option to use a browser that's up-to-date and as safe as possible on an unsupported operating system."
But enough was apparently enough.
Microsoft called it quits on Windows XP a year ago Tuesday, when it issued the final scheduled security updates for the 2001 OS. (The company made a one-time exception shortly thereafter when it shipped an emergency patch for its Internet Explorer (IE) browser.)
Because Microsoft halted security fixes for IE on Windows XP on April 14, 2014, security professionals urged the OS's users to switch to another browser. Dropping IE for Chrome, Mozilla's Firefox or Opera Software's Opera was one way to minimize -- but not eliminate -- risk, they said.
Neither Mozilla or Opera have publicized end-of-support dates for their browsers on Windows XP.
According to Web metrics vendor Net Applications, approximately 18.5% of all Windows PCs ran XP in March, slightly more than half the 34.5% the OS accounted for in October 2013, when Larson set Chrome's earliest support demise at this month.


 to a hand with a pointing finger
  .
., and then clicking Control Panel. In the search box, type mouse, and then click Mouse.


 After seeing the above image, close it. On your keyboard, press ctrl + shift + delete (on mozilla, google chrome or internet explorer) and clear all browsing history including all cookies.


